How to Install Acoustic Wall Panels?
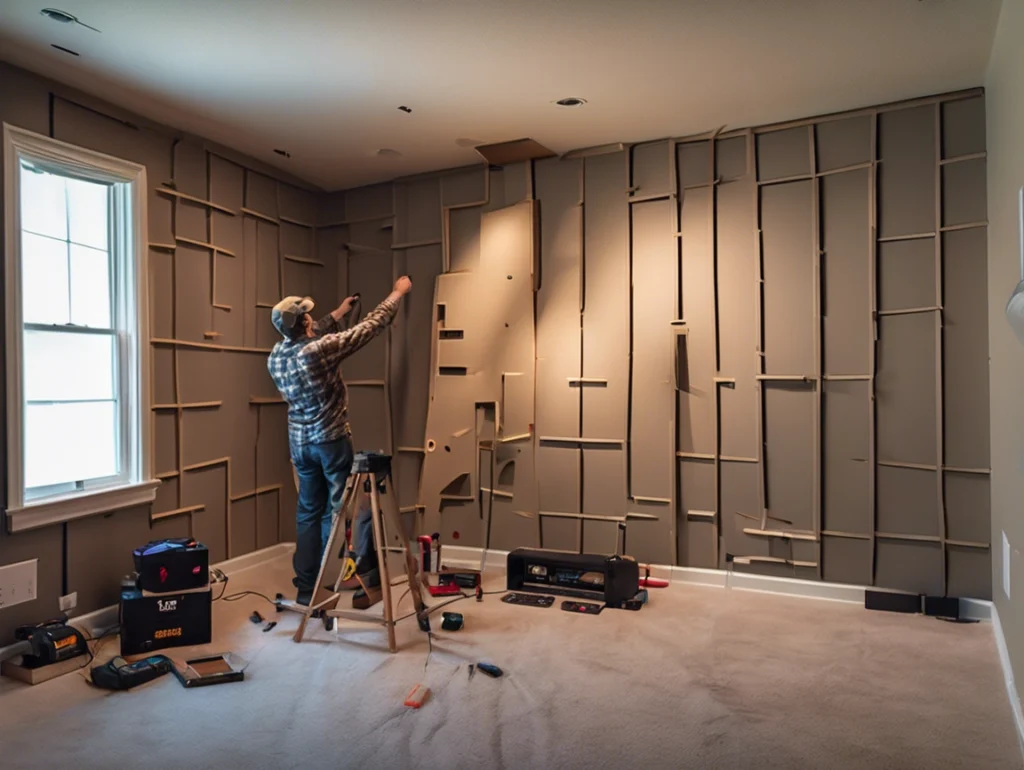
Installing acoustic wall panels is a simple DIY project that can transform noisy spaces into peaceful retreats. Whether you’re soundproofing a home theater, office, or apartment, this guide covers tools, techniques, and pro tips to mount panels correctly—and avoid costly mistakes.
Key Takeaways
- Tools Needed: Stud finder, level, adhesive/screws, acoustic sealant.
- Cost: 2–30 per panel (DIY) vs. 8–15/sq. ft. (professional).
- Time: 2–6 hours for a standard room.
- 2025 Hack: Use damage-free adhesive strips for rentals.
Tools & Materials
| Item | Purpose | Cost |
|---|---|---|
| Acoustic panels | Noise absorption/blocking | 10–100 each |
| Adhesive strips | Rentals or lightweight panels | 5–20/pack |
| Screws + Z-clips | Secure heavy panels (wood, MLV) | 10–30 |
| Acoustic sealant | Seal gaps for better soundproofing | 8–15/tube |
| Stud finder | Locate wall studs for secure mounting | 20–50 |
| Laser level | Ensure straight, even placement | 30–100 |
Step-by-Step Installation Guide
1. Prep the Wall
- Clean the Surface: Wipe walls with a damp cloth to remove dust.
- Find Studs: Use a stud finder to mark stud locations (critical for heavy panels).
- Seal Gaps: Apply acoustic sealant around outlets, cracks, or edges.
2. Plan Panel Layout
- Measure the Wall: Calculate how many panels fit (standard panels: 2×4 ft).
- Mark Positions: Use a laser level and pencil to outline where panels will go.
- Focus on Reflection Points: Use the “mirror trick”: Sit where sound originates (e.g., couch in a home theater). Have someone hold a mirror against the wall—where you see speakers reflected is where panels should go.
Pro Tip: Leave 1–2 inches between panels for optimal sound dispersion.
3. Choose Mounting Method
A. Adhesive Strips (Lightweight Panels)
- Best for: Foam, fabric, or rental-friendly setups.
- Steps:
- Attach strips to the panel’s back (follow manufacturer’s guide).
- Press firmly against the wall for 30 seconds.
- Hold in place for 1–2 minutes.
B. Screws + Z-Clips (Heavy Panels)
- Best for: Wood, MLV, or permanent installations.
- Steps:
- Attach Z-clips to the wall studs using screws.
- Slide the panel onto the clips.
- Secure with additional screws if needed.
C. Suspension Systems (Ceiling/Walls)
- Best for: Offices or commercial spaces.
- Steps:
- Install metal tracks on the ceiling/wall.
- Hang panels using hooks or wires.
4. Install Panels
- Start from a corner and work outward.
- Double-check alignment with a laser level after each panel.
- For MLV-backed panels: Overlap edges by 1 inch and seal with acoustic tape.
5. Test and Adjust
- Use a decibel meter app to measure noise before/after.
- Tap walls to check for hollow spots (add sealant or extra panels).

Common Mistakes to Avoid
- Ignoring Studs: Mounting heavy panels on drywall alone causes sagging.
- Overcrowding: Cover only 30–50% of the wall to avoid over-deadening.
- Skipping Sealant: Unsealed gaps reduce effectiveness by 20–30%.
2025 Installation Hacks
- Magnetic Panels: Swap designs without remounting (e.g., Vicoustic’s FlexiPanel).
- Pre-Glued Panels: Peel-and-stick options save time (ideal for foam).
- Smart Layout Apps: Tools like AcouStamps simulate panel placement via AR.
DIY vs. Professional Installation
| Factor | DIY | Professional |
|---|---|---|
| Cost | 2–30 per panel | 8–15 per sq. ft. |
| Time | 2–8 hours | 1–2 days |
| Best For | Small rooms, rentals | Large spaces, complex materials |
| Warranty | None | 1–5 years |
Maintenance Tips
- Monthly: Vacuum fabric panels; wipe wood/metal with a damp cloth.
- Avoid: Harsh chemicals, steam, or abrasive tools.
- Repair: Use acoustic sealant to fix loose edges or gaps.
FAQs
Q: Can I install panels over wallpaper?
A: Yes, but ensure the wallpaper is firmly adhered. Use heavy-duty adhesive.
Q: Do panels work on brick walls?
A: Yes! Use masonry screws or adhesive designed for rough surfaces.
Q: Can I reuse panels after removing them?
A: Only if mounted with adhesive strips or magnetic systems.
Conclusion: Silence Made Simple
Installing acoustic wall panels is a quick, affordable way to block noise and upgrade your space. Whether you opt for renter-friendly adhesive strips or pro-grade Z-clips, proper planning and sealing are key to success.
Ready to start? Download our free installation checklist or order DIY kits today!
Free samples
In recent years, composite products have become more and more popular all over the world. We believe you will also be interested in this new material. If you are interested, you can come to consult us. We have a professional service team that can not only answer any questions you may have but also provide you with free samples. Let you better understand the composite products. There is no doubt that composite wall panels will be the new future.
Share

James is a content creator and decorator with five years of experience designing home decor. In his daily life, james is constantly on the lookout for the latest, great examples of house design and further optimizes his solutions. Additionally, he writes articles related to outdoor design, interior design, and architectural decorating materials to help brands build more engaging relationships with their audiences.


